
.jpg)
 1 year ago
148
1 year ago
148
PROTECT YOUR DNA WITH QUANTUM TECHNOLOGY
Orgo-Life the new way to the future Advertising by AdpathwayAuthor by Jane and Sonja on January 10, 2025 Updated on January 10, 2025
Create your own fun centerpiece for Winter by reusing an empty coffee tin along with some fun ribbon, felt flowers, faux greenery and pine cones.
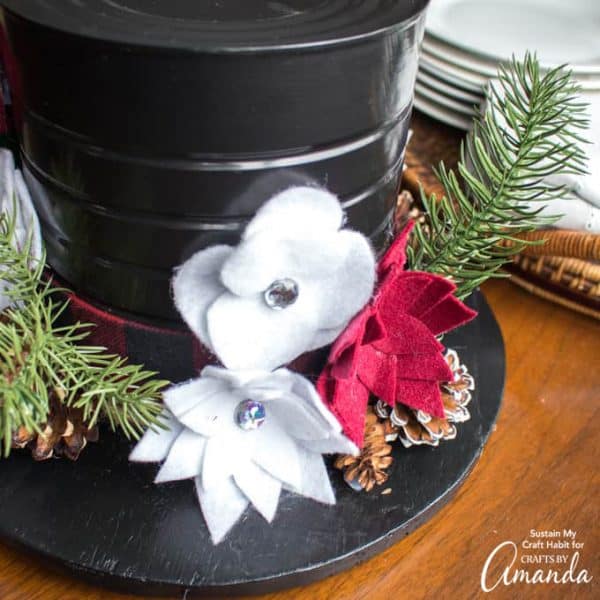
Hi friends! We are so excited to share this latest DIY project idea: a fun and quirky, yet beautiful snowman hat centerpiece that you can enjoy all Winter long.

Why this project works
Can you guess what the top hat of this centerpiece is made from? I’ll give you a hint. For most people, it’s something they can’t get enough of in the morning. Yup, that’s right, it’s a coffee tin! We are always trying to use materials we find around the house or from nature to create beautiful decor and crafts. And this centerpiece is no exception!
This snowman hat centerpiece would look lovely paired with these snowy pinecone luminaries and these wood slice trees, giving your home a winter-themed vibe all season long!

It’s not only a lot of fun to gather the materials but assembling the centerpiece was really enjoyable. From painting the coffee tin to embellishing the pine cones to gluing on the flowers, seeing the pieces all come together was such a neat process. Look around your house for creative ways to make a beautiful centerpiece like this one.
And for more creative ways to reuse items from your home, check out this upcycled candy tin turned pumpkin decor or this upcycled wine and liquor bottle room decor. Just a little bit of creativity goes a long way!
Craft supplies you will need

How to Make a Snowman Hat Centerpiece
These step by step photos and instructions are here to help you visualize how to make this project. Please scroll down to simply print out the instructions!
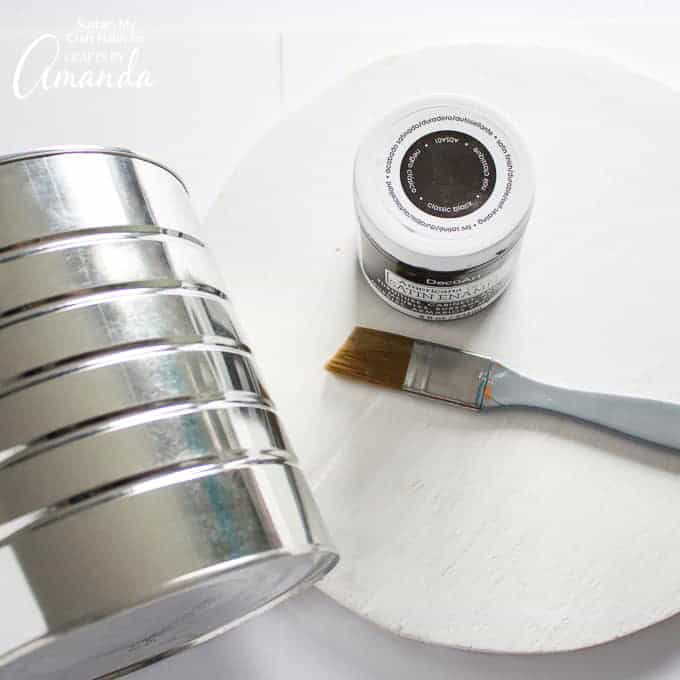
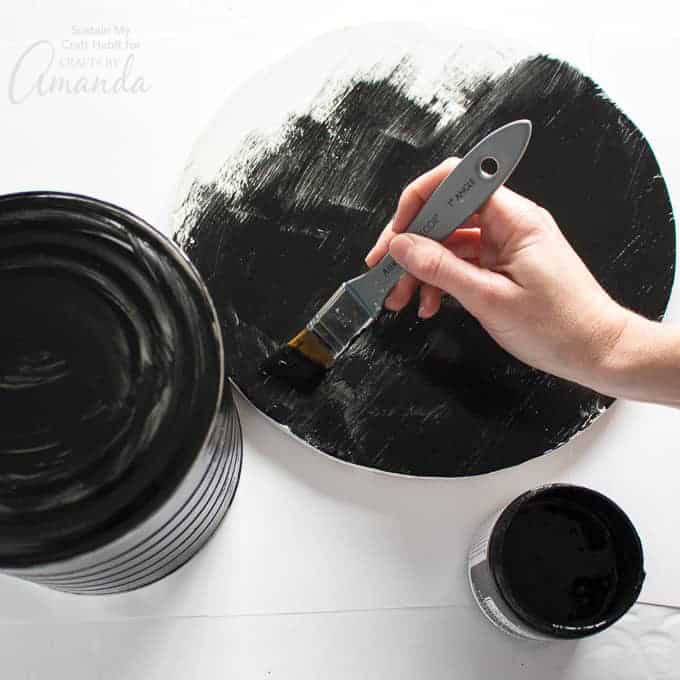
Preparing the Top Hat
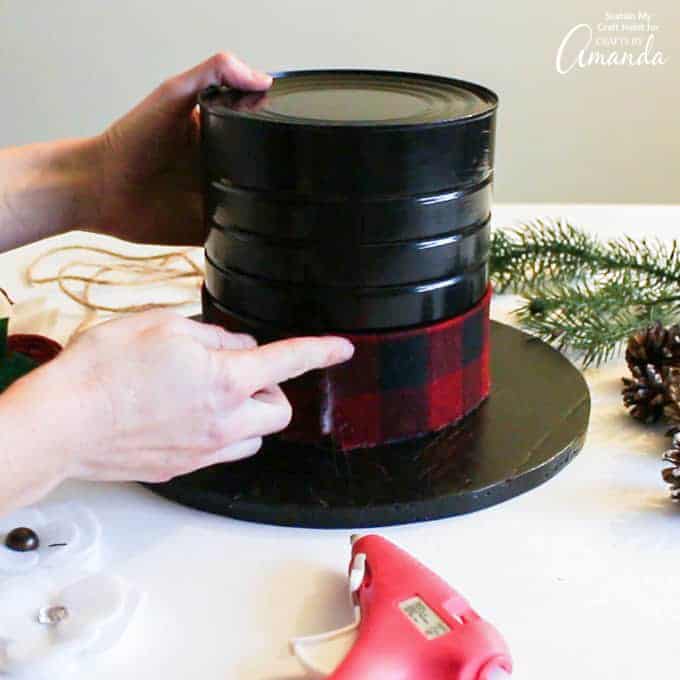
- Using Americana Decor Satin Enamel, paint the outer surface of the coffee tin in classic black. Leave it to dry and then apply another coat of paint for full coverage.

- Paint the base of the top hat in classic black as well. We used a round piece of plywood cut to 14″ diameter. Alternatively, you could use a round tray, large plate or platter.
Tip: add felt pads to the bottom of the top hat centerpiece so it can get moved around easily and avoid scratching the table surface.
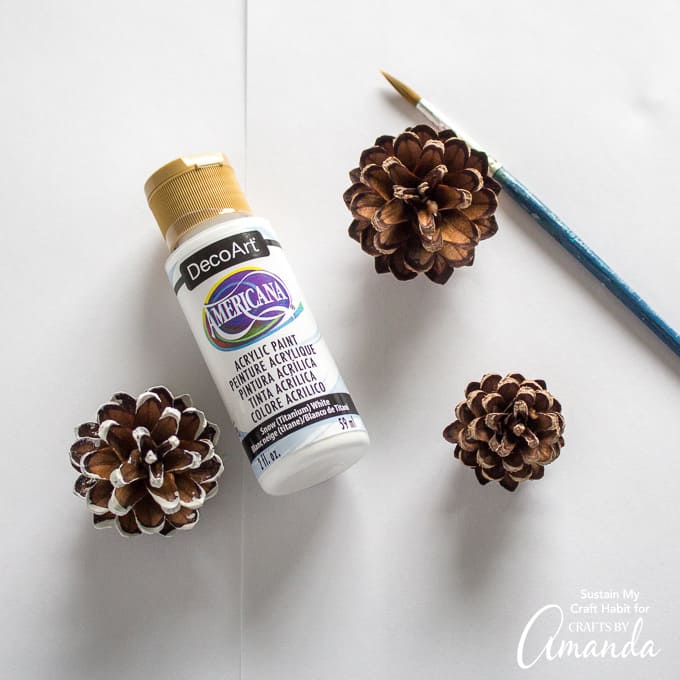
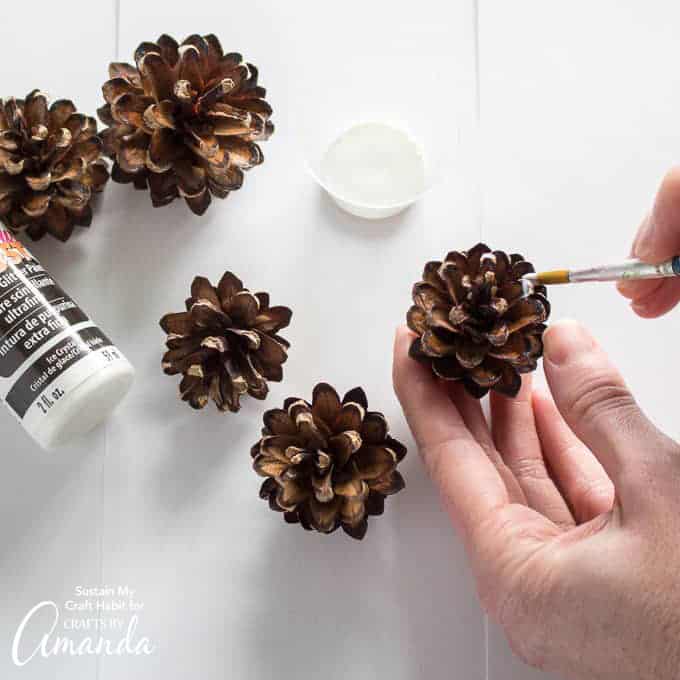
Painting the Pine Cones:
- Using a fine tip acrylic paintbrush, add some white acrylic paint to the tips of the pine cones to resemble a dusting of snow.
- For a few of the other pine cones, add some ultra fine glitter paint to the tips.
- Put all the pine cones aside to dry fully before using.
Preparing the ribbons and other trims:
- Measure the circumference of the tin and cut the ribbon slightly longer than the circumference of the tin.
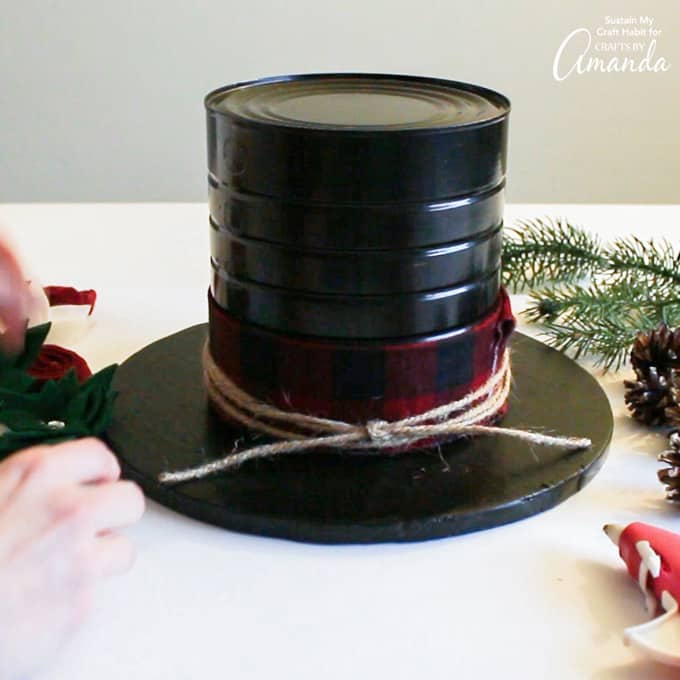
- Wrap the twine around the circumference of the coffee tin 3 times and leave an additional 6” extra. Cut the ends and put aside for time being.
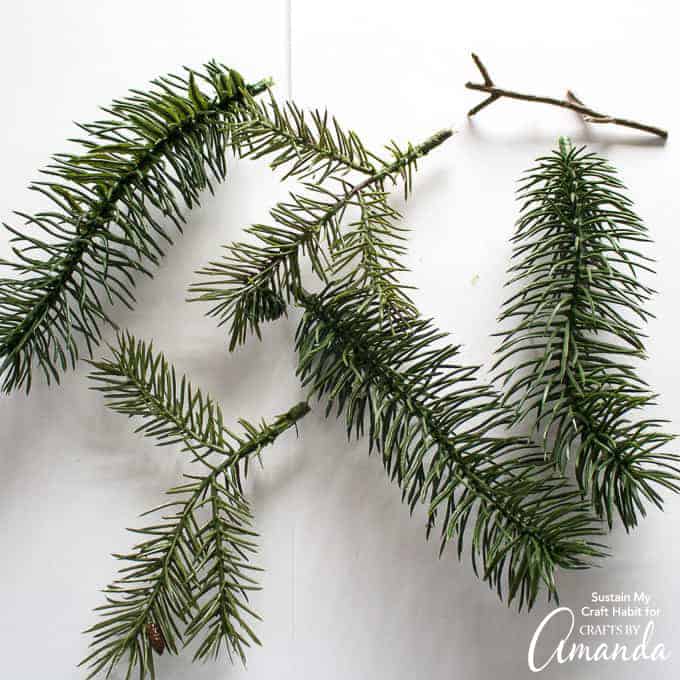
- Separate the faux winter greenery into smaller sized bunches.
- I made a bunch of felt flowers for this centerpiece (9 in total). Firstly, I followed this template on how to make felt flowers in forest green, maroon and white colors. And then I made several variations of felt flowers using the felt flower wreath pattern template from Cricut’s Design Space using the same felt colors. Any style of felt flowers will do for this centerpiece, make them all the same if you like!


Assembling the Hat Centerpiece:
- Working quickly and carefully, apply a good amount of hot glue to the top edge of the painted coffee tin. Turn it upside down and stick it onto the center of the painted base. Hold firmly until the glue sets.
- Apply hot glue close to the base of the top hat in sections, wrapping the wide ribbon around the base as you go.
- Wrap the twine around the base of the top hat 3 times and tie the ends into a bow of glue in place.
Finishing the Top Hat Centerpiece:
Divide the hat in 3 sections and add your extra embellishments within these sections in this order:
- Attach the faux greenery with hot glue.
- Apply the felt flowers in groupings of 3 or more per section with hot glue.
- Glue the painted, glittered and plain pine cones onto the base of the top hat.
- Attach the bird and any other fun embellishments as desired using hot glue.


And there you have it, another great reason to drink coffee!

We hope you enjoy your upcycled coffee tin top hat centerpiece this Winter!
More winter crafts
- Winter Hat Door Hanging
- Mason Jar Lid Snowman
- Winter Luminaries
- Waterless Snow Globes
- Christmas Village Shadowbox
- Don’t miss this snowman door!
I love to create and share my projects with you! I know it’s hard to remember to come back and search, so I’ve made it easy for you with my weekly newsletter! You can subscribe for free and I’ll send you fun crafts every week right to your email.
Snowman Hat Centerpiece
Create your own fun centerpiece for Winter by reusing an empty coffee tin along with some fun ribbon, felt flowers, faux greenery and pine cones.
Age Group: Adult Crafts
Project Type: Christmas
Author: Amanda Formaro
Supplies
- Coffee Tin
- Large round platter with a 14” diameter
- 2 ” wide decorative ribbon
- Twine
- Felt Flowers assorted styles in maroon, dark green and white
- Pine cones assorted shapes and sizes
- Americana Decor Satin Enamel in Classic Black
- Glamour Dust Ultra Fine Glitter Paint in Gold Glitz
- Americana Acrylics in Snow Titanium White
- Paint brushes assorted sizes
- Faux Winter greenery
- Decorative bird accessory or ornament
Craft tools
Measuring tape
Hot glue gun and clear glue sticks
Instructions
Paint the tin can and platter in a classic black satin color.
Paint the tips of the pine cones using an acrylic white paint color.
Add gold glitter paint to the tips of a few other pine cones.
Assemble coordinating felt flowers.
Separate faux Winter greens into smaller bunches.
Assemble all the prepared materials starting with the top hat:
Glue the painted coffee tin to the painted black base platter.
Glue the ribbon and twine to the base of the top hat.
Glue the other accessories (faux greens, felt flowers and pine cones) to the base in three different sections.
This post originally appeared here on Dec 19, 2018.
Jane and Sonja are sisters, moms and lifelong craft addicts both living near Toronto, Canada with their families. They share their love of creativity, nature and coastal craft and DIY ideas on their blog Sustain My Craft Habit.
Latest posts by Jane and Sonja (see all)
Reader Interactions
Free Tutorials+ Free Craft Book!
Get your copy of of "5 Christmas Ornaments to Make" when you subscribe!


 English (US) ·