PROTECT YOUR DNA WITH QUANTUM TECHNOLOGY
Orgo-Life the new way to the future Advertising by AdpathwayWhy settle for a box messing up your decor when you can make this mason jar tissue holder in minutes? Add tissues to the inside and ditch the box! This is perfect for your nightstand or anywhere else in your home where you want to keep tissues on hand at all times.
This project pairs well with our mason jar soap dispenser too!

Why we love this project
I added some vinyl to the front of my mason jar tissue holder but you can leave it plain or even add a monogram. Think of all the ways you can paint and decorate mason jars. That is how many ways you can make your own tissue holder! The sky is really the limit.
With the cold season upon us, you might want to get supplies to make a few of these! You might just need one in every room.
Related: Love these and looking for some more mason jar ideas? Try this change jar for the laundry room.

Supplies needed to make a Mason Jar Tissue Holder
- Wide mouth mason jar with smooth sides
- Craft paint in the color of your choice
- Paintbrush
- Kleenex Upright tissues
- Vinyl in the color of your choice (optional)
- Transfer tape (optional)
- Cricut or Silhouette cutting machine (optional)
- Bless you art for cutting (optional)
- Thick card stock
- Craft knife
- Self-healing mat (optional)
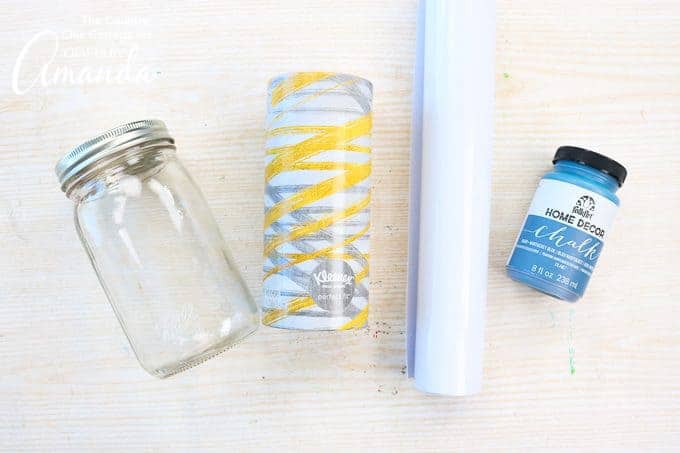
How to Make a Mason Jar Tissue Holder
- Remove the lid from your jar and paint the entire thing with a few coats of craft paint. Allow to dry completely between coats.
- While your project is drying you can make any embellishment you want for the front of the jar. To make the “bless you”, download our file by clicking here. Then upload to the software for the cutting machine of your choice.
- Cut from any color vinyl.
- Once your jar is dry, weed your vinyl and use transfer tape to add to the front of the jar.
- Then use your lid as a template and cut a round circle from thick card stock.
- Use a craft knife to cut an X in this card stock but stop short of the edges of the circle. You will want to use a self-healing mat under this or a scrap piece of cardboard to protect your surface.
- Then add the circle into the band of your mason jar.
- Remove the Kleenex tissues from the upright container and place in your jar.
- Then screw on the band with the card stock in place.
- Pull up on your first tissue and your mason jar tissue holder is ready to place anywhere around your home.

What will you add to the front of your version of this project?
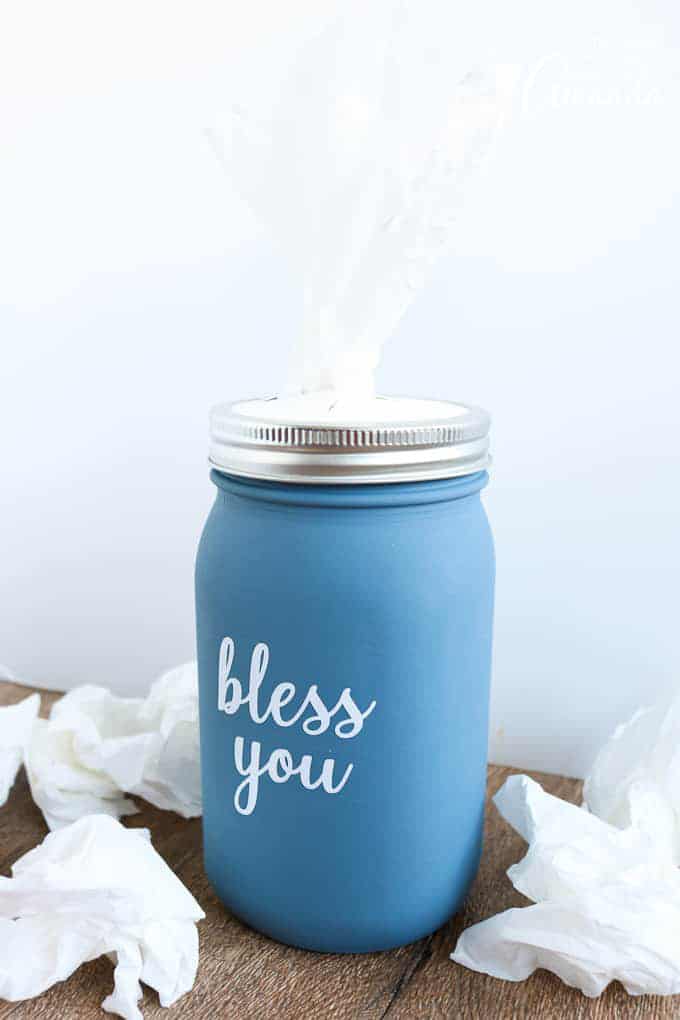
Be sure to pick colors and designs that work with your home. After all, you want your mason jar tissue holder to be part of the decor!
More Mason Jar Crafts
Mason Jar Tissue Holder
Make your own mason jar tissue holder in the color of your choice with a little bit of paint and some adhesive vinyl!
Prep Time0 minutes
Crafting Time45 minutes
Total Time45 minutes
Age Group: Adult Crafts
Project Type: Home Decor
Author: Angie Holden
Supplies
- Wide mouth mason jar with smooth sides
- Craft paint in the color of your choice
- Paintbrush
- Kleenex Upright tissues
- Vinyl in the color of your choice optional
- Transfer tape optional
- Cricut or Silhouette cutting machine optional
- Bless you art for cutting optional
- Thick card stock
- Craft knife
- Self-healing mat optional
Instructions
Remove the lid from your jar and paint the entire thing with a few coats of craft paint. Allow to dry completely between coats.
While your project is drying you can make any embellishment you want for the front of the jar. To make the “bless you”, download our file by clicking here. Then upload the software for the cutting machine of your choice.
Cut from any color vinyl.
Once your jar is dry, use transfer tape to add the vinyl to the front of the jar.
Then use your lid as a template and cut a round circle from thick card stock.
Use a craft knife to cut an X in this card stock but stop short of the edges of the circle. You will want to use a self-healing mat under this or a scrap piece of cardboard to protect your surface.
Then add the circle into the band of your mason jar.
Remove the Kleenex tissues from the upright container and place in your jar.
Then screw on the band with the card stock in place.
Pull up on your first tissue and your mason jar tissue holder is ready to place anywhere around your home.
This post originally appeared here on Jan 21, 2019.
Angie Holden is author of The Country Chic Cottage where she shares crafts, recipes, and DIY projects daily.She lives on a farm in rural Tennessee with her husband and three children.She loves creating and sharing her creations on her blog and social media.
Latest posts by Angie Holden (see all)


 English (US) ·
  French (CA) ·